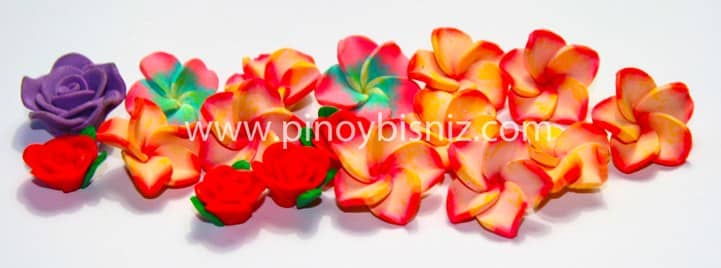
 Making polymer clay beads is a fun and creative way if you want a personalized your accessories. The clay is so easy to work with, even children can use it, and it is non-toxic after baking. Polymer clay comes in many colors that can be mixed together like paints to form patterns and new colors. Its texture makes it ideal for sculpting, cutting and molding into beads.
Instructions
Things You’ll Need
- Polymer clay
- Smooth cutting surface (to be used only for clay)
- Small acrylic roller
- Pasta machine (to be used only for clay)
- Bead mold
- Bead reamer tool
- Bead baking rack
- Metal cookie sheet
- Parchment paper
- Household oven
- Fine-grade sandpaper (optional)
- Glaze/Varnish (optional)
- Small paintbrush (optional)
-
Preparing the Clay
1 Unwrap the package of clay and break off about one quarter of the block. It will feel crumbly at first.
2 Work the clay with your hands by pressing, squeezing and bending it. As it warms, it will hold together better.
3 Flatten the clay to a thickness of about 5mm with your hand or roll it out on your cutting surface with a craft roller.
4 Feed one end of the flattened clay into the pasta machine and turn the handle to move it through the rollers.
5 Fold the clay in half and pass it through the machine again.
6 Repeat step 5 until the clay is soft and malleable.
7 Store any unused clay in an airtight plastic bag.2. Molding the Clay
1. Tear off a small chunk of the prepared clay and roll it into a 1/2″ ball.
2. Place the ball in the bead mold and slide the top and bottom pieces of the mold back and forth against each other to form the bead shape.
3. Remove the bead from the mold and pierce it with a thin hanging wire from the bead baking rack.
4. Lay the wire in a slot in the rack.
5. Repeat steps 1 to 4 to create enough beads to fill the rack. -
Testing the Oven Temperature
1. Pre-heat the oven to the temperature specified on your clay package. You must be careful not to overcook or burn the clay or it will release toxic fumes. For common brands such as Sculpey and Fimo you usually cook the clay for 20 to 30 minutes at 275 degrees F.
2. Prepare three or four flat strips of clay about 1/2″ wide to test the accuracy of your oven’s thermostat.
3. Place the strips on a cookie sheet lined with parchment paper.
4. Cook the strips of clay for 20 minutes at the temperature specified on the packaging.
5. Let the strips cool.
6. Bend the strips into U shapes. If the clay remains flexible after repeated bending and does not break, the oven is fine. Clay that is shiny, brown or looks burnt indicates the oven is too hot. Clay that snaps in half means the oven is too cold.
7. Adjust the oven temperature by 10 degrees and repeat the test until you have the oven temperature correct for your clay.Baking the Beads
1. Place the bead rack on a cookie sheet.
2. Make sure no beads are touching each other on the wires.
3. Place the cookie sheet and bead rack in the oven.
4 .Monitor the oven so the beads do not stay in the oven past the recommended cooking time.
5. Remove the cookie sheet and rack from the oven and let the beads cool on the rack.Finishing
1. Sand any bumps or fingerprints from the beads with the fine-grade sandpaper.
2. Place the beads back on the baking rack to apply glaze or varnish with a paintbrush and let them dry.
3. Paint beads with acrylic paint if you like.
For more information about Polymer Clay , come to the 26th NEGROS TRADE FAIR on September 28-October 2, 2011 at Rockwell Tent, Makati City. We will have a free demonstration on Polymer Clay Making


